Model Color Remap Tutorial
INTRODUCTION
GoldSrc has a feature called "color remapping" which means textures on a model can be hue-shifted in two ranges of the texture. This means the hue is changed but the saturation and value remain the same. Because of this, if you use greyscale or black and white there would be no change.
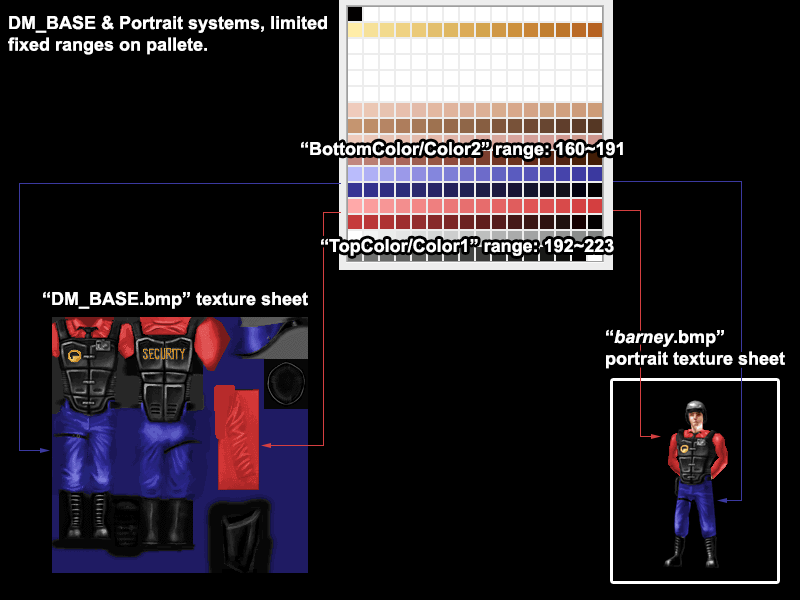
Color remapping in GoldSrc is done in two systems: The old system known as DM_BASE.bmp which is derived from the Quake1 pallete remapping ability which allows for 2 pallete ranges of 32 colors each, from palette index 160 through 191 for color1, and 192 through 223. and 32 for color2. This older system is found in HLDM models and playermodel portraits.
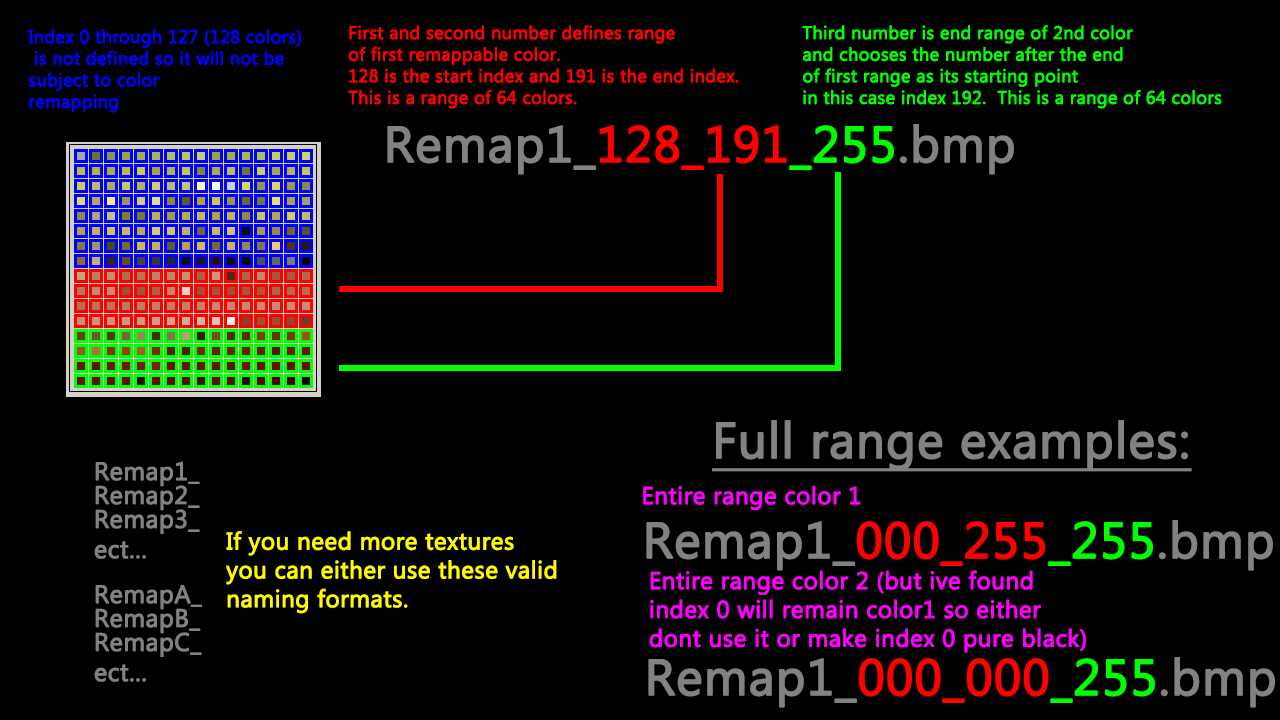
The second more advanced system is called:REMAP_ This system was first introduced in Team Fortress Classic for team color switching and is avalible for all GoldSrc games. REMAP works differently in that instead of being two fixed 32 color pallete ranges, allows for a variable pallete range based on the BMP filename. This allows for more detail when needed; the way this works is by a "remap" with a number or letter to differentiate the remap textures, then the first number after is the range of the unchanged colors.
The second number is the range of color1, and the third number starting from the end of the 2nd number determines color2. A typical example is say Remap1_128_191_255.bmp which is 128 colors unchanged, then 64 colors for color1 and 64 colors for color2.
Playermodels are the primary uses of Color remapping but the same playermodel remap "topcolor" & "bottomcolor" ALSO control viewmodels with remap textures
In addition Model entities in J.A.C.K/Hammer can use the keyvalue "colormap" which can be taken from HLAM here:

The keyvalue can be added by turning off "Smartedit" and manually added to your entity. In Sven Co-Op, you can instead use "topcolor" & "bottomcolor".
Table of Contents:
Model Texture Maker
AGCRemapper
Manual Photoshop Method (with video)
Gradient Photoshop Method
There are several different ways to do color remapping so be sure to check them all out depending on your needs. We will be starting out with ModelTextureMaker , but if you need a GUI method, the easiest method known as AGCRemapper which does most of the heavy lifting for you with mask inputs.
The second method is the manual method in photoshop which does take some time, and the third method is an alternative photoshop method provided by norman rodger
For model remap previewing you will need "Half-Life Asset Manager"
Download HLAM here
NOTE: Remappable textures are NOT compatible with $externaltextures command.
This will cause a game close with the message:
"Cache_TryAlloc: 1433893744 is greater than free hunk"
Model Texture Maker
Model Texture Maker is a new addition to the "WadMaker" Command Line suite which allows automatic pallete conversions and can make remappable textures. The official documentation is here: Model Texture Maker
NOTE: Ive yet to write my own guide on this so the above documentation is currently the only guide right now.

AGCRemapper
AGCRemapper is a program written in Python by MoltenEQ which will help you create remap textures with ease using your texture and two mask textures to create the remappable texture. In its current form it is fixed to 64 & 64 for color1 and color2.
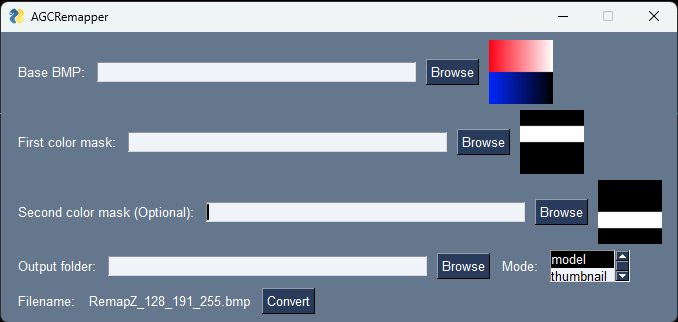
1) Have a BMP file that you want to convert. Create 1 or 2 masks that have the same size as the original image. Non black (#000000) areas will be seen as the parts you want to recolor. Tip: Make sure that your masks don't overlap for best results.

2) Once files are loaded into AGCRemapper, click "Convert". The result file will be Remap!_128_191_255.bmp or thumbnail.bmp.
3) Rename your file to...
(model texture) Remap!_128_191_255 where ! should be replaced with a single number or capital letter of the English alphabet (0-9, A-Z). Make sure that your SMD and QC files uses the same texture names!
(thumbnail) make sure that the filename matches your MDL's name! Preview thumbnails are WIP.
4)Compile the model with the tool of your choice (e.g.: Crowbar) / copy the thumbnail to MDL's folder.
PhotoShop Manual
This method takes a bit longer and requires an external program however is in video format:
Corrections to this video:
1. the old Jed's is no longer used as a viewer
2. portraits are 164x200
PhotoShop Gradient method
An alternate method for creating remap textures by Norman, requires no external pallete program.
1) Make selections of your areas of recolor & unchanged and save them into alpha channels in the channels tab. Then Ctrl-click the first alpha channel then go to your layers and either use the selection to make a copy of that part or what im doing and desaturate that area
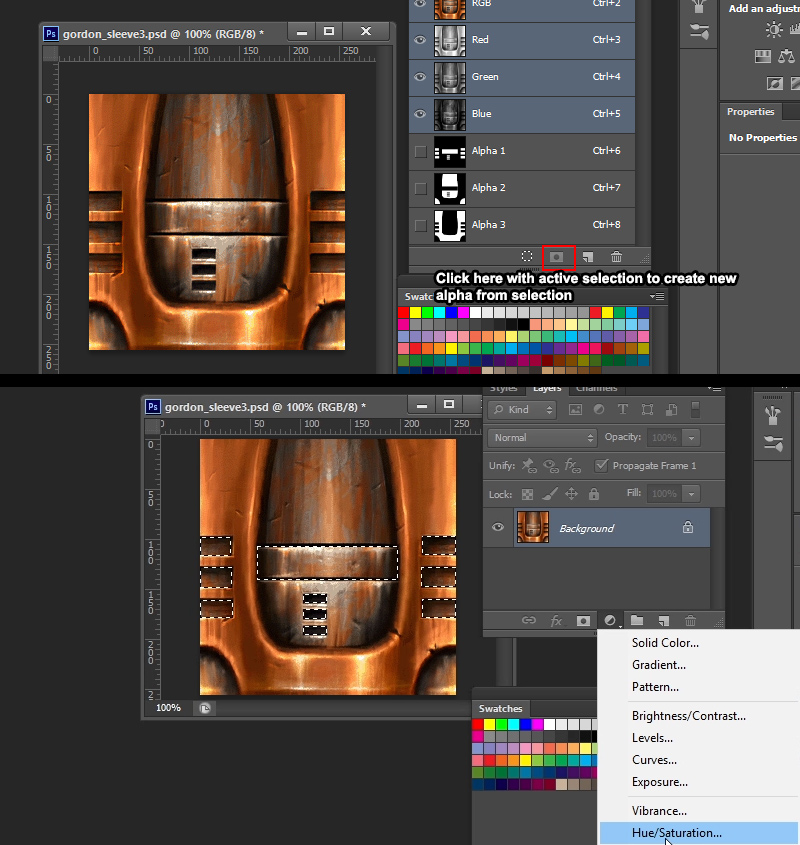
2) In my case im just desaturating but you can just mask off this area as a copy in its own layer as we are making the unaffected area. You can have whatever colors in the unaffected area
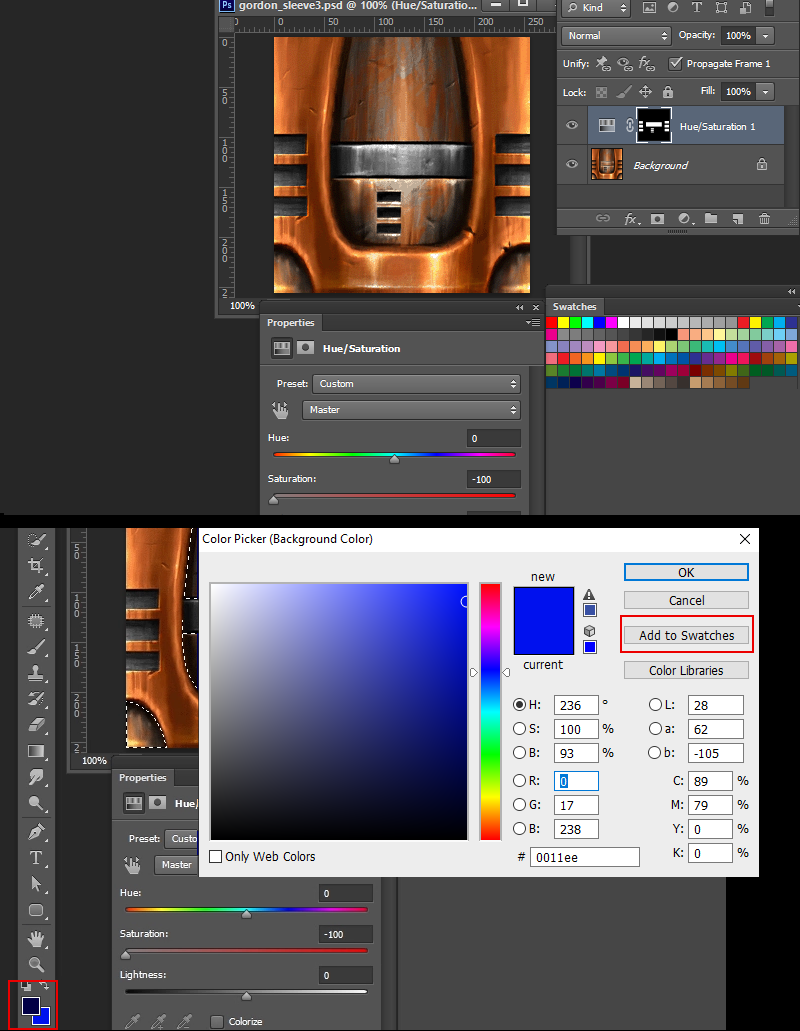
Select your background color first and have it as your brightest color in the range. Then when picked, click "add to swatches". When that is done Repeat for the foreground color which will be your darkest.
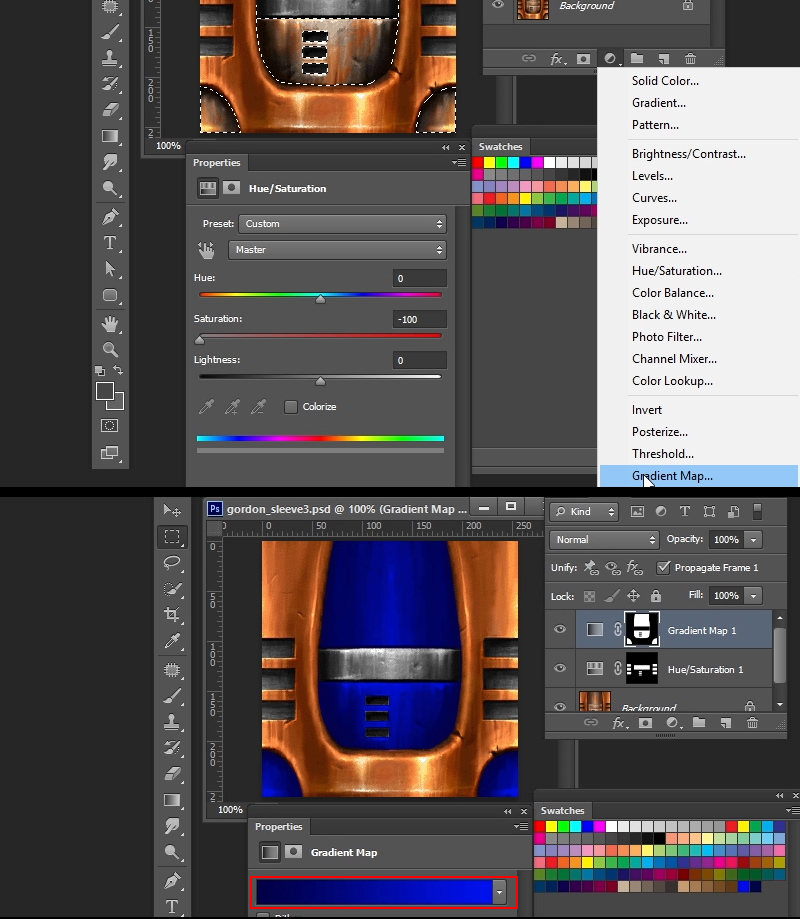
3) Load up the next alpha channel and then click the bottom halfcircle icon and go to "Gradient Map"
The gradient map will now tint the area between the two chosen colors. If that did not work, choose the "Foreground To Background" preset in the gradient map properties by clicking here in the red area
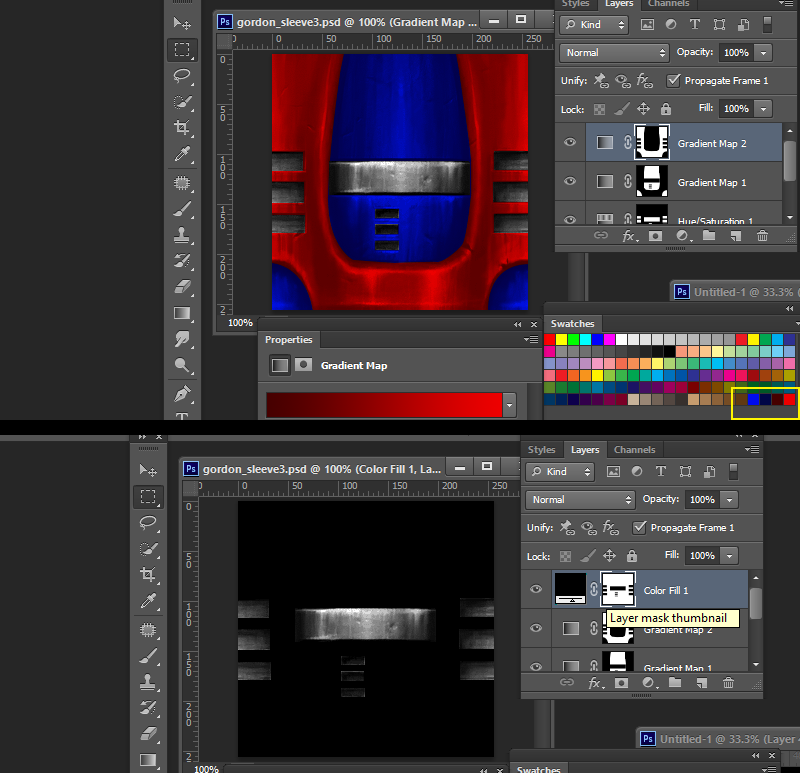
4) Repeat the exact same process for your next saved alpha channel selection. In this case im using dark red foreground, light red background.
Now the image is prepared and the swatches saved
Select the alpha channel of your unaffected area to load the selection, then go to the halfcircle icon and select "color fill" set to black, then select the layer mask to the right then invert with Cmd-I. This will make a black area around your image
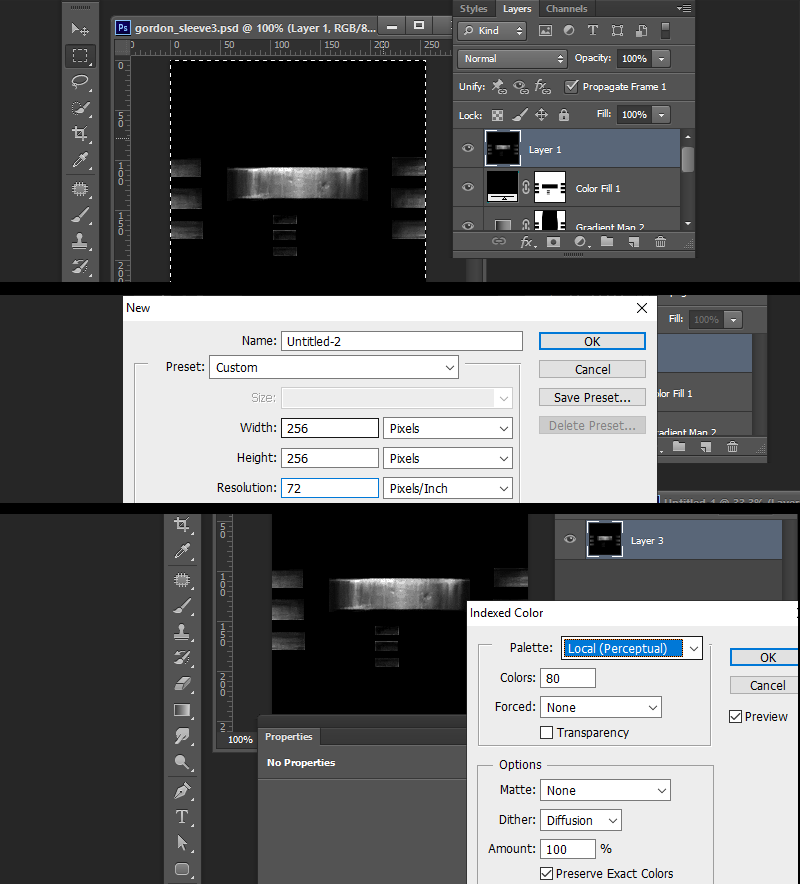
5) Create a new layer at the top then go:Cmd-Shift-Alt-E To create a flattened image of your layers Select all then copy that layer
Create a new document
Paste the image into the new document then go toimage>mode>indexed color>Local then change the "Colors" number to an amount you want for the unaffected range. I choose 80 colors since this is a simple image. Other works that have multiple colors in unaffected range id give more like say 128~160 ect.
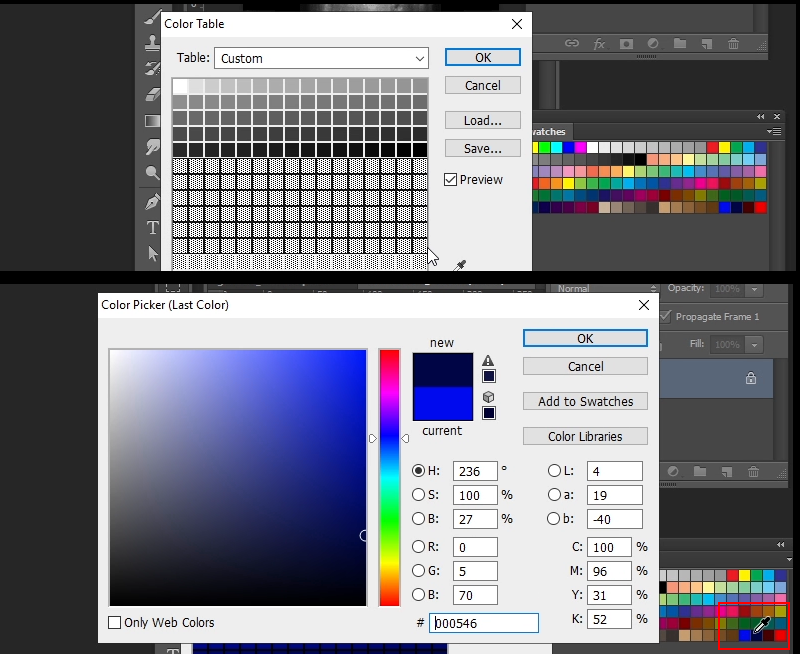
6) Once you chose the number of colors, then click the "Pallete" option and set to "Custom". When that opens up with a color table, then do this:Click-Shift-drag your chosen range. Im choosing index 80~159.
When releasing the hold-click it will prompt you with color picker. Choose from the saved swatch the first then when prompted, choose the second.
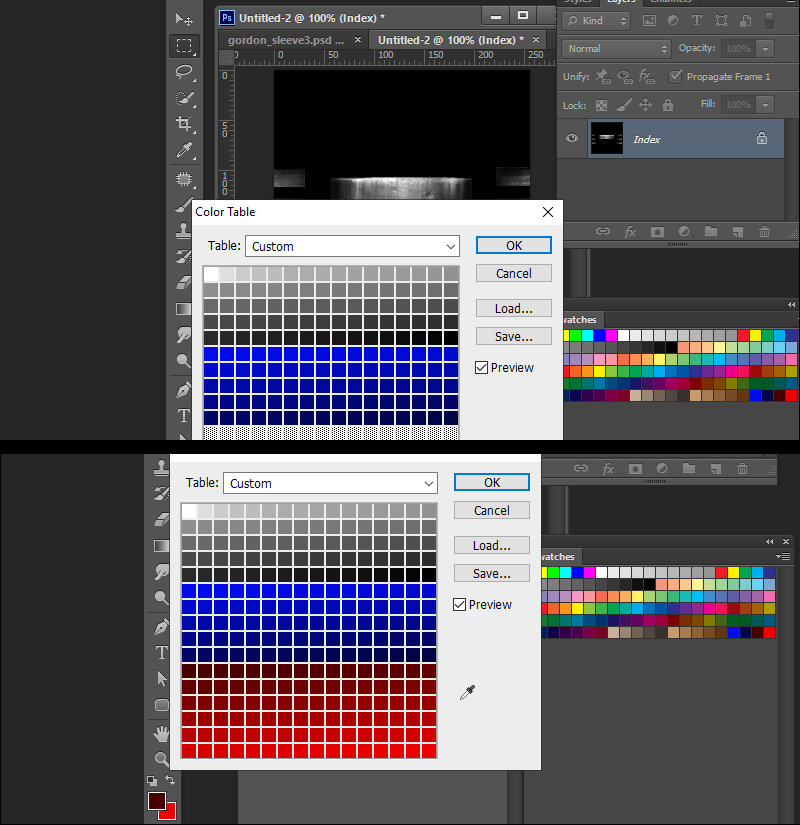
7) You will now have a perfect blend from the first to the last color, replicating your gradient map but now restricted within your defined range of color index.
Repeat the same process but for the last 2 colors. Your pallete is now ready.
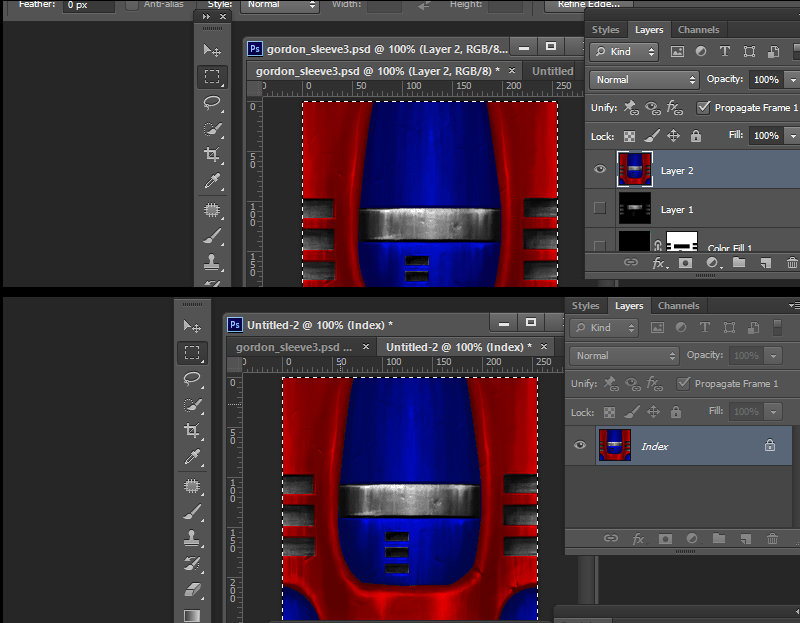
8) Go back to your first document, hide the layer1 then again do:Cmd-Shift-Alt-ETo create a flattened image of your layers. Select all then copy that layer
Go to the document 2 that you indexed then go paste. The image is now complete.
Save as 8bit BMP, and name the image according to your set ranges. Since i chose 80 unaffected, then another 80 for the first color, then 96 for the second I name the image: Remap1_080_159_255.bmp
9) Test in HLAM to test out the ranges.
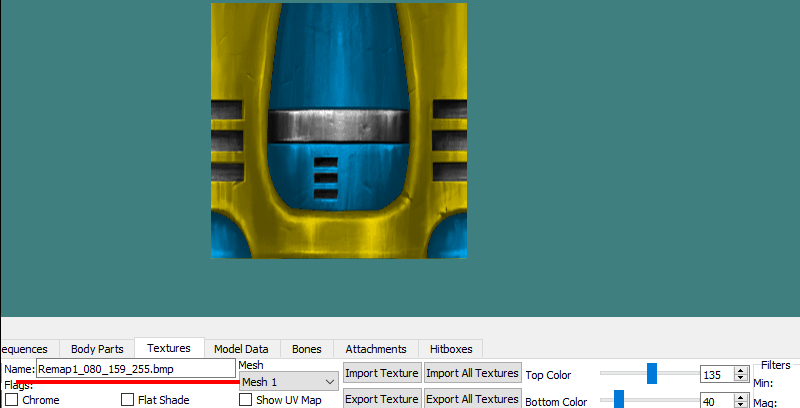
Note: HLAM also allows for BMP renaming in compiled models so you can change at that post-compile point if needed or replacing an image that didnt have remapping before.