"Chrome" in GoldSrc is a special texture mode that allows for a simple environment-like texture that is limited to 64X64 (However Sven Co-Op has removed that hard limit). The Chrome effects most notable examples are barneys helmet, the magnum revolver, the gauss gun, and the alien grunt armour. Authoring of chrome is often misunderstood, so I wrote this guide to make the best of this and to begin ill state that "Chrome" textures in GoldSrc function identically to what is more known as "Matcap shading". The way this works is that the spherical image space of the texture is mapped by the corresponding normals of the object.
This allows for a wide variety of effects depending on how you make your sphere image. You can make things look plastic, metal, shiny, underlit, rimlit, toon shaded, and even outline. A Neat thing of note is that with chrome mode existing UV's are unused due to the nature of it, so if you are making an object or part that you are sure is gonna be chrome, you can skip UV Unwrapping procedures.
This guide assumes you know about model compiling, if you do not head over to The MDL Guide. Also you can swap out existing chromes with HLMV in texture tab.
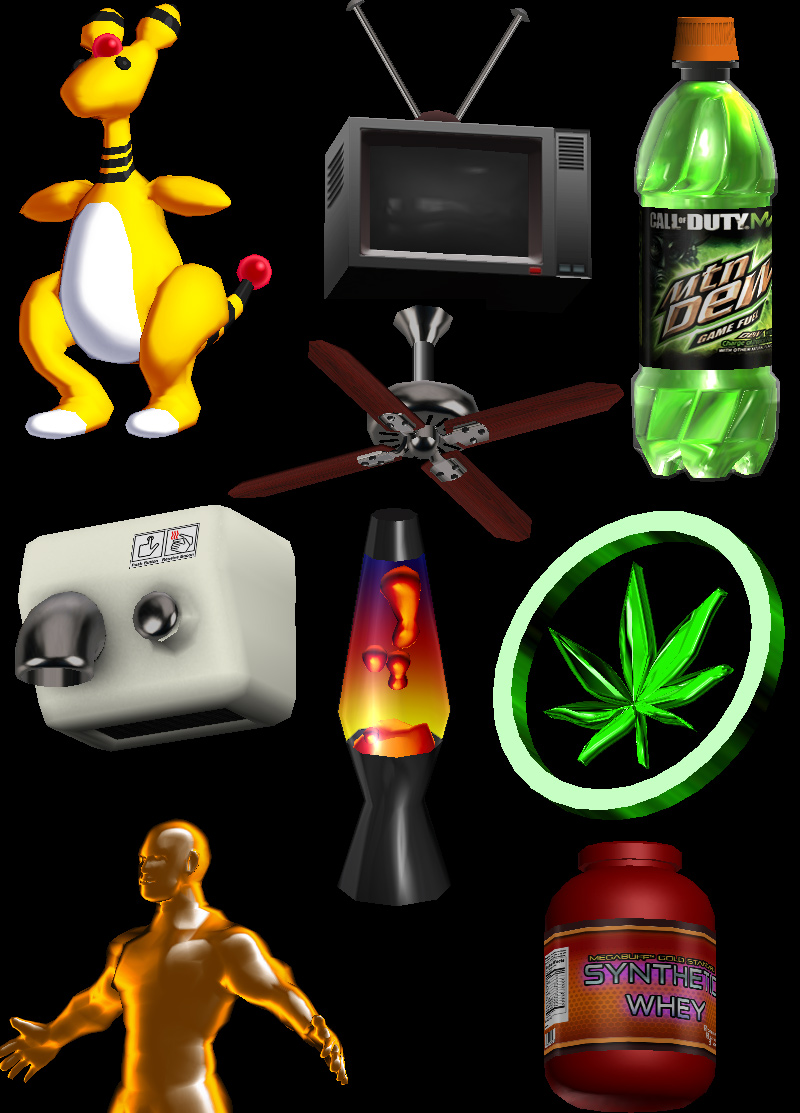
Examples:
Things to Know before getting started
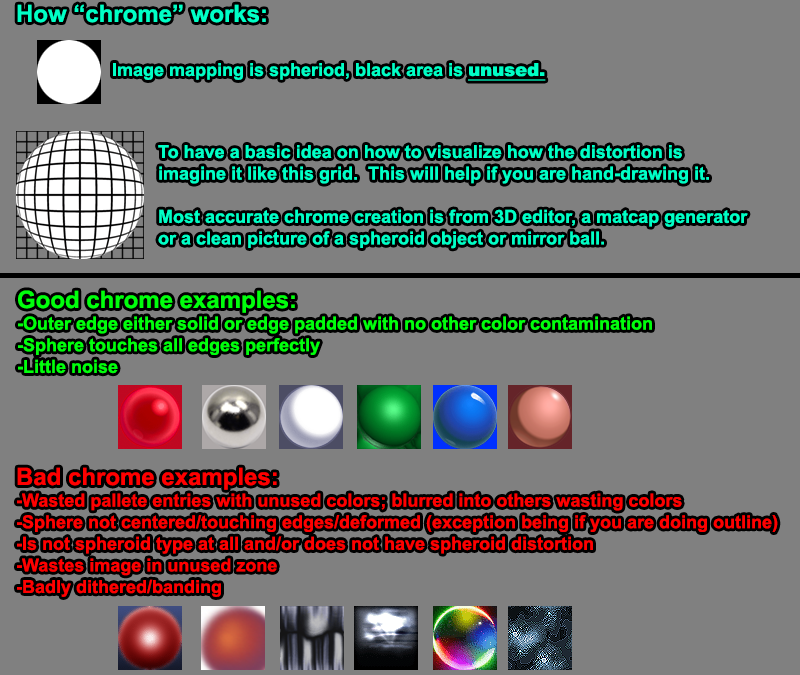
When authoring chrome images all edges of the sphere area must touch the boundaries, generally best to use an image that isnt "too busy" or detail. Basically smooth simple gradients are nice, where as a lot of busy or noisy detail will look bad. Lots of different colors can be an issue due to pallete limitations. Due to the small resolution sometimes "surface blur" helps with this a lot before resizing for "busy/noisy" images.
I generally avoid dithering when indexing BMPs to reduce noise. When doing final 8bit export ive found that the program IRFANVIEW tends to give the best results and less banding/noise than even photoshop at times.
A big tip is dont waste pallete entries; You only have 256 colors so to reduce banding make sure the outer, not mapped gaps either have a solid color or no other stuff or else you are wasting colors that could be used. What I usually do is make a circle selection that touches the boundaries, invert it, and then fill with a solid color, usually the same color or darker than the edges of your image. I also do this at the very last step AFTER resizing. Use "bicubic smoother" when you resize for smoother gradients as other resizing methods like sharper can make for a more noisy messier chrome.
Generating sphere images can be done manually in paint programs but personally for anything realistic I either render out a sphere in a 3D program or use a standalone matcap generator tool like "Matcapgen". With these you can easily change lighting directions and other effects while keeping sphere accuracy.
A final word on how chrome works is that chrome uses the bones that have the mesh skinned to as the camera reference point. This means that for the most part many models will be fine due to their rigging, but if you have say a static model with everything skinned to a bone in the bottom of the model you may have some distortion. This can also happen with weapons where if you have a chrome material in the front like the gauss but the rigged bone is further back you may have some undesired chrome beheviour. This can be noticed if the chrome changes significantly when you zoom in or out in a model viewer or in game. For the most part many models will be fine but if you do have this issue, you can add some additional bones or more and center it to the model, then skin the parts to it.
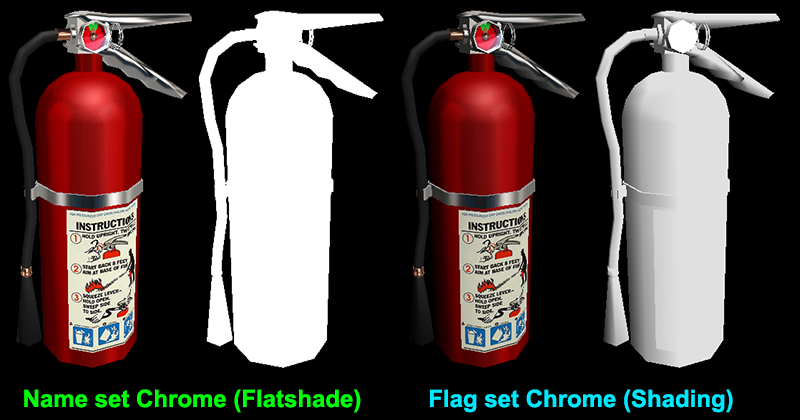
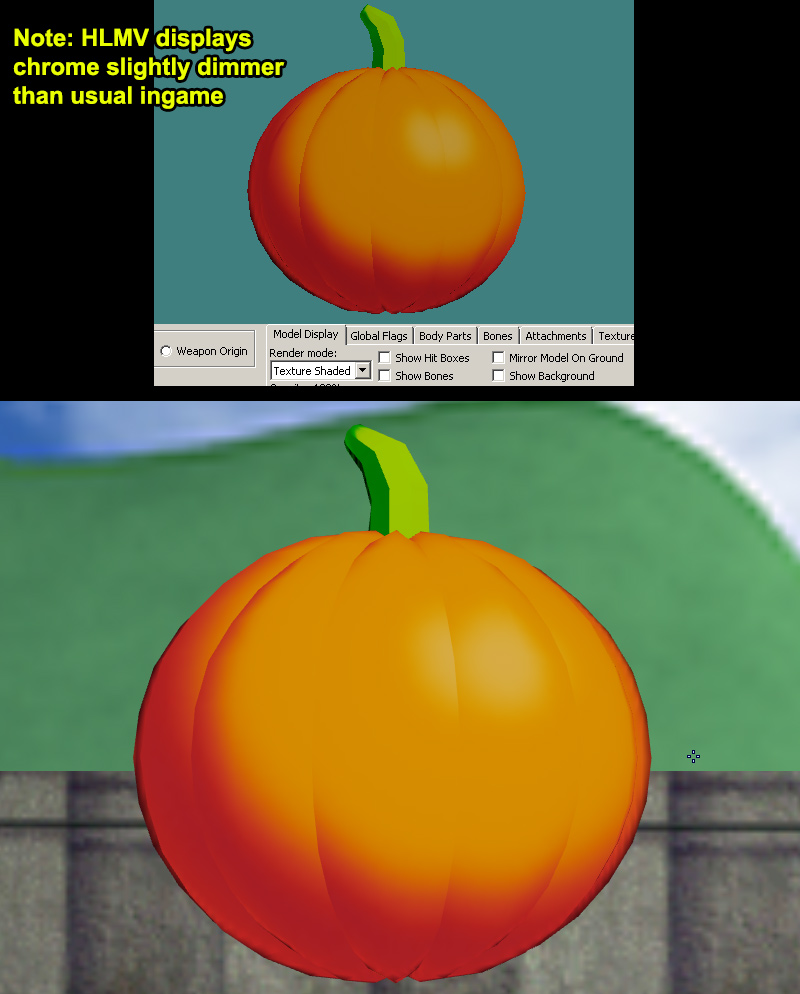
There are TWO types of chrome in goldsrc: filename set which is the most commonly known and the lesser compile-flag set. Name set is done by putting the words "chrome" in the filename and the filename separated by a _ example: "CHROME_metalpipe.BMP". This way the compiler can enable the texture to use this effect. With name-set, the texture is flatshaded as in its ambient lighting is a constant due to ignoring surface normals and does not generate shadows. This is best for things like stlyistic or textures that would suffer from black shadows and let the texture do the work. Remember with texture authoring you can use whatever in the image as your highlight and shadow/lighting. In the Ampharos model in the examples on the top left, you can see how I used a warm orange as my shadow.
The second way is know as "flag set" which does not have the "chrome" name in the filename. It is done by putting in the compile code $texrendermode mytexture.bmp chrome or alternativley, on an already compiled MDL using HLMV set "chrome" flag checkbox and resaving the mdl. Flag set chrome unlike name set has vertex shading shadowing just like regular textures. People prefer this for a more realistic/shadowed chrome.
Another common use of chrome is faking transparent glass or lighting effects by combining Nameset chrome with "Additive" texrendermode.
Making a Chrome BMP
As mentioned before, photoshop sometimes will cause a badly banded/dithered result depending on your chrome and I usually will instead go with IRFANVIEW which I will show next. If you want to do this just skip this indexed step, leave the working file as is in RGB mode and save a PSD.

1)Scale your image to 64X64 with "Bicubic smoother" as your resize filter.
2) Convert the texture indexed color by going to mode> Index.. and set to any of the "local" palettes (perceptual, selective, and adaptive*). Preview the image. Generally keep dithering off or to a minimum to keep noise down. Save the BMP as "orange_chrome.bmp"
*Adaptive algorithm reproduces colors most often in image, Perceptual takes spectrum priority of the eye, Selective favors colors that appear in large areas and graphics.
2a)With IRFANVIEW you can directly open your .PSD working file and do the 8bit conversion. Go to Image>Decrease color depth.., then set to 256 colors with "Use Best Color Quality". Then save your BMP as "orange_chrome.bmp".

The finished result:
Vertex Normal Editing For Enhancing Chrome
WIP, more images coming soon.
There are times where you will want more control over the shading in your model and the way you can do this is editing vertex normals. Most 3D modelling programs can do this but the methods/capabilites can be somewhat different. Older modelling programs may not allow for vertex normal editing at all. In this guide I will focus on 3dsmax & blender. Some reccomended reading here on Polycount's WIKI on vertex normals.
Vertex normals determine the shading of an object and are set by smoothing groups or the like. With editing you can use a variety of techniques such as using a reference object, radial projection, or "FaceWeightedNormals" technique.
3DSmax requires scripts to do reference object or more advanced vertex normal editing and plugins can be found here.
When vertex normal editing with blender you must triangulate your mesh first or else the SMD will export wrong.Blenders "Normal Edit" modifier has a built-in target & Radial feature as well as a "Mix factor" for increasing or decreasing the desired effect. In addition if you make a copy of your mesh and do multiple edits or different effects, then combine with "data transfer" in topology & face corner data: custom normals to copy.
Face Weighted Normals or "FWN" for short requires the model itself to have certain bevels to work so its a more advanced technique. Keep in mind adding bevels increases your polycount so try keep them simple 1 face and not a multi-edged chamfer. For faceweighted normals in 3dsmax I reccomend Arrimus3ds video.
For blender 2.79 there is a plugin called Y.A.V.N.E, and a video on that here. For 2.80 There is now a built-in modifier called "Weighted Normal Modifier" included.
Sven Co-Op Unlocked Chrome
WIP, more images coming soon.
As of version update 5.18 of Sven Co-Op, the engine removed the hard 64X64 chrome limit so you can use higher resolutions, however this also requires to use the Sven compiler found in the "Svencoop SDK" under "tools" steam tab and in the "modelling" folder. As of writing this currently no standard Halflife Model viewers can properly display Sven higher rez chrome so you have to test ingame.
In all my tests and methods ive found that the highest and optimal is 256X256 before diminishing returns.